
Our festival and beach theme is up and running at Little Hands Design and we’ve gone tie dye mad! It’s a great way to make a simple project much more interesting! Have a go yourself it’s super easy!


You will need:
Fabric
Elastic Bands
Dyes (We used Dylon hand dyes. Use instructions if you use different dyes)
Pippet
Bucket
Apron
Gloves
First of all you need to choose what kind of tie dye you want to do! Here are the options!

Green top circles middle top spiral, pink random circles!

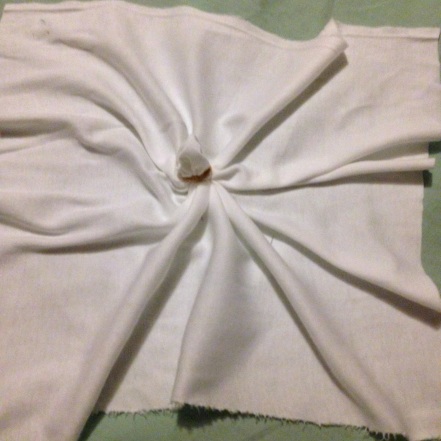
Tie Dye Spiral:
Pinch the centre of your top and twist until it makes a small bunch.


Stretch elastic bands over the bundle making segments.
Tie Dye Circles:
Pinch the centre of your top, then lift off the table. Tie your first band around the tip.


Move down the sausage shape with elastic bands at regular intervals.
Random circles:
Pinch the fabric wherever you want to and tie on an elastic band. Repeat all over the top.

Do the same for your back strips!
Dyeing:
To mix the dye you need (or something to the same ratio!)
2 teaspoons dye (approx. 8g)
8 teaspoons of Salt (40g)
1/2 litre of warm water


You can either submerge the whole thing in one colour…
… or dip into different colours! BE VERY CAREFUL NOT TO MIX THE COLOURS.
Or use a pipette to apply colour to different sections.


Drying/submersion time:
Leave colour for at least 1 HOUR!
Place the bundle under cold running water, when it starts to run clear take off the elastic bands.
Keep washing thoroughly until water runs clear. Dry. Then iron to fix colour.

To make a top!
Advanced: Hem armhole sections.
All: Fold over 3cm along the top edge to the wrong side. Pin and sew to make the tunnel.
Advanced: Hem all edges.
Use a safety pin to feed ribbon through the tunnel to make the neck tie!
Advanced make your own tie from fabric!
